Search

UnconventionaLiving

Only Tooth Powder – the one where I try a new recipe!!

Don’t you just love those moments you go to do some basic every day task – like brush your teeth – and say whoops, where did all my tooth powder (or toothpaste) go?!?!?!?!!

Time to get creative. Now plenty of times I have grabbed some just plain old nasty baking soda to get the job done that day. But why not have more fun. And besides, I am a firm believer on a restorative and re-mineralizing tooth powder (and here is why). And a new recipe was born out of what I had on hand- so far I love it though now that I have started I will probably tweak it in future to incorporate ingredients I didn’t have readily available.

The Recipe (these amounts were not exact):

3 tablespoons baking powder
1 tablespoon diatomaceous earth (great source of silica!) source (make sure you use food grade, and a little goes a long way!)
Pinch of sea salt
2-3 drops of clove essential oil
1-2 drops of peppermint oil
20-40 drops of trace minerals (here will be my main future change, to add something with calcium)

Mix thoroughly until all the liquid components fully disperse into the powder and you are left with a dry powder.

I put it in the empty bottle my store-bought tooth powder came in!

OnlyMeg

DISCLAIMERS:
1. I am not a medical professional, any information contained within this website should not be used as medical advice.
2. Some links contained within this website are to affiliate websites and I may receive compensation for your following these links. (I sure hope I do cuz I wanna keep blogging!)
3. All information and product recommendations are based on my own research, bias, and personal experience.

About these ads

Occasionally,

Only Movement

Big ol’ shout out this week to Katy Bowman of the Restorative Exercise Institute. Thank you Katy for all your work and all you share with the world.

I just love this quote from a Katy Says Alignment snack I did a few days ago. (sorry for the paraphrasing, going from memory here)

“Exercise is like taking vitamins and minerals but not eating any food.”

Movement on the other hand is like eating food. So just like food, our movement needs to be nutritious. Sure we may “supplement” with exercise. And junk “food” will keep you alive for today, it will provide some “calories”. But neither will keep you alive and truly WELL and being your personal best for years to come. So just like the buzz words around the web about eating whole foods, and nose to tail eating. We need “whole food” “whole body” movement. And according to Katy, it really all starts with our feet.

Enter natural movement. If you haven’t heard of it, check it out. I have read two of Katy’s books – Move Your DNA
– Whole Body Barefoot

Both are great reads. For the casual reader she is witty and makes bio-mechanics easy to read and entertaining. For the reader who really wants to learn some science and technical bits – that is in there for you too.

And for anyone out there who has jumped on the barefoot movement bandwagon – these are MUST READS if you want to learn how to avoid a potential for injury.

You can also learn a lot to start off from her podcast “Katy Says” or on her blog.

Exercise. UG who has time? I know I don’t. I try, I do enjoy exercise, love it even. But I also love my family, my friends, cooking and eating healthy yummy foods, volunteer work, personal enrichment, and a whole lot of other things. And then there is all the “musts” – I must work, I must maintain my budget and balance my checkbook, I must grocery shop, I must clean, I must sleep. Yes… Sleep. So how to fit in “exercise” with all the other parts of life. We all know we can’t be couch potatoes and expect to be healthy people, no matter how well we eat.

I fell in love with natural movement as soon as I heard of it. I am still very early on my journey to incorporating it into my lifestyle. And there will always be certain immovable obstacles that prevent all encompassing natural movement within our modern world. But I do what I can and push the boundaries and remove some of the confines. And it WORKS. For me anyways.

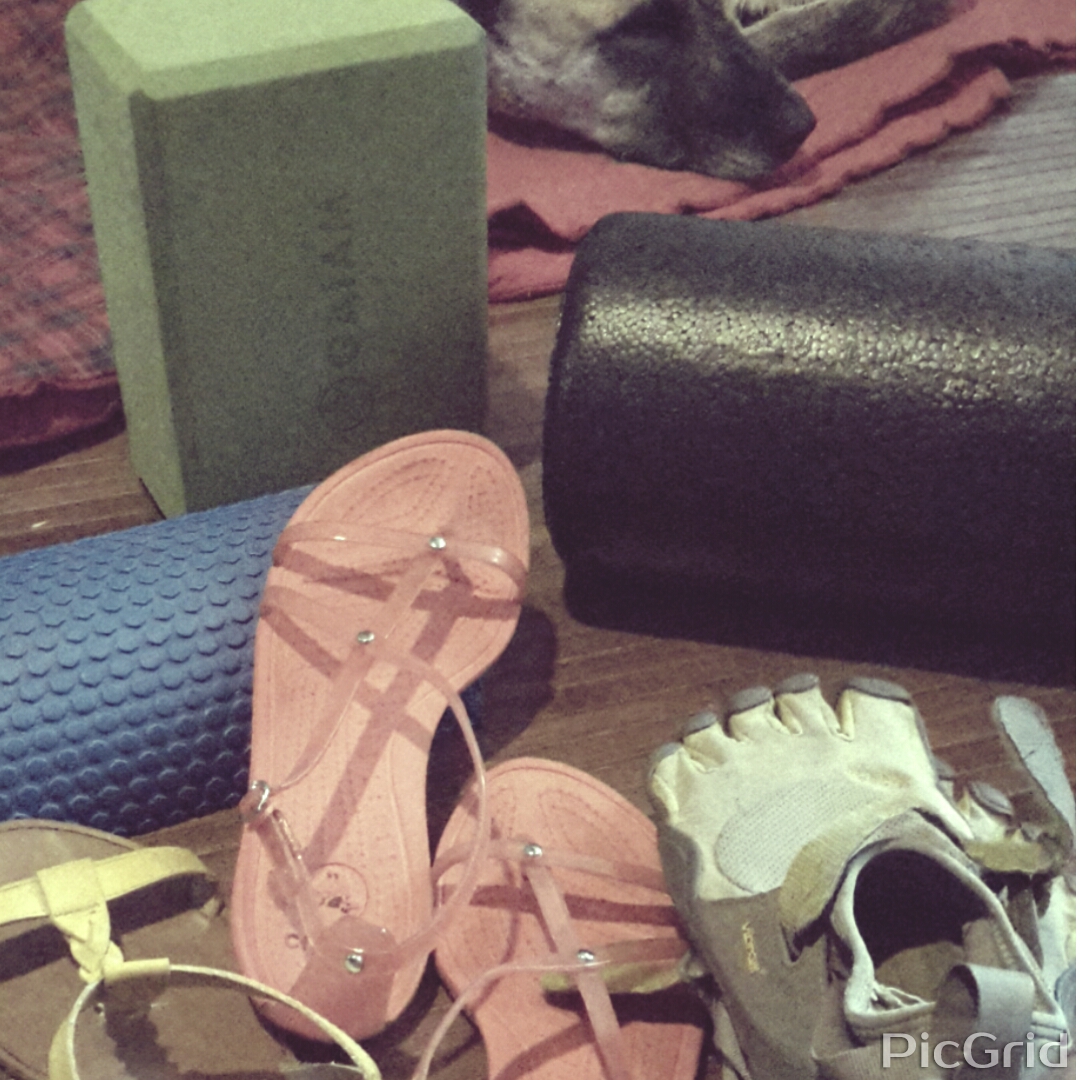
I enjoy doing the “alignment snacks” occasionally at best. And I’ll admit that I usually only remember to do the correctives when something in my body says “ouch help me!”. And as “easy” as it is to simply sit down on the floor instead of the couch – it takes no extra time, I do still fight those couch sitting habits.  One thing I have accomplished, is for years I would mostly wear “flats” and even my Vibrams for hiking and backpacking, but still wore heels and high heels at least a couple times a week with my “fashionable” business attire. However in January I made a commitment to minimal footwear. It is not that easy to find minimal options in dressier women’s shoes. And some sacrifice has been made on my part in choosing affordable function over affordable form. But it was worth it. My foot pain has totally vanished. The only exception in my minimal footwear being that 8 hours a week I wear work boots with a positive heel (until I can afford to replace them with these which are a decent seeming close to minimal option for the industrial workplace).

But even with all of that said. My life is already improved. No life altering, world shattering change like this guy (his story is pretty amazing). But improved. A LOT. It is just the little things each day. Each small decision to walk instead of drive, plop on the floor instead of the couch, stretch and move when something hurts instead of curling up and just saying “ow”. Carrying a big basket of groceries instead of pushing around a cart. Each of those tiny little things add up. And over time I have less low back pain, less shoulder pain, less foot pain, less knee pain.

And hey. The other day. I CARRIED A GIANT HEAVY BOX ALL THE WAY TO MY GATE HALF A MILE AWAY INSTEAD OF DRIVING IT THERE. And then I walked back. Uphill. STEEP uphill. I may not be able to walk to the store (the closest one which doesn’t carry what I need anyways is over an hour walk down a narrow dangerous road). But I FOUND A WAY TO WALK. And bonus because it was just to the gate and back, my dog got to hike with me.

I was sore the next day, it was something that challenged me physically, but also mentally (Thought process as I walked: “ugh why did I decide to carry this big box again? Here let me shift it to the other side, let me try holding it on my head, nope still heavy. oh well I’m stuck now, better keep going at least its downhill!”). And I came away feeling great and feeling SO accomplished. I can’t wait to do something like that again.

For me here in California, I am looking forward to winter to actually be able to get outside in real outside terrain more. Seems backwards, but it has just been too hot here not only for the exertion itself, but also to go “off trailing” through the massive fields of poison oak which is my backyard requires cooler weather with more protective/warmer clothes!

Hope everyone has a fantastic Monday – And hopefully we can all find a way to make our week more fantastic by just moving in some small way we would normally not have in our busy modern lives.

OnlyMeg

DISCLAIMERS:

**I am not affiliated or associated in any way with Katy Bowman, the Restorative Exercise Institute, or the Katy Says podcast or blog. I am just a consumer of what she has provided to the world, and wanted to share my experiences with her methods.**

The usual stuff:
1. I am not a medical professional, any information contained within this website should not be used as medical advice.
2. Some links contained within this website are to affiliate websites and I may receive compensation for your following these links. (I sure hope I do cuz I wanna keep blogging!)
3. All information and product recommendations are based on my own research, bias, and personal experience.

Only Cookies – An original recipe! – Spent Buckwheat Crisps – Gluten free, nut free, dairy free – Easy!

Not just any cookies. I scoured the internet for ideas on what I could do with my spent buckwheat leftover from brewing our first 100% gluten free alternative grain homebrew beer. Nothing. Can you imagine? It’s not a common thing to want to cook with (lol). I had about 2 gallons worth of this oatmeal like gluey leftover buckwheat. I couldn’t throw it away. Not after spending all week painstakingly soaking, sprouting, roasting (aka malting) 3 pounds of the stuff.

So time to experiment! After doing some research into ratios of flour vs fat vs sugar and how much leavening to put and what different leavening agents do for the texture. I put together a little recipe to try. And shockingly enough – it was really close to good on the first try. Now these aren’t the traditional chewy soft type of cookies – but after baking them for about 30 minutes, and then cooled, they made a lovely little thin chewy but crisp type of cookie. Dark, rich, full of flavor from the buckwheat. Just a little tweaking and here is the resulting recipe:

Spent Buckwheat Crisps
Prep time: about 5 minutes
Cook time: 28 minutes
Makes about 40 cookies

2 cups spent buckwheat mush
1 cup oat flour (I buy this gluten free oat flour)
1 1/4 cup coconut sugar (this is what I have right now) – adjust for personal preference
3/4 cup softened coconut oil  – here is where my biggest adjustment was, and I might reduce it even more next time – also I may use butter next time!
1 tsp baking powder (use aluminum free! Here is why! Thanks Sarah for the great info as always!)
1.5 tsp vanilla extract
1 tbsp of spices of your choosing, I used a mix of cinnamon, ginger, & cloves
1/4 – 1/2 tsp sea salt – I would leave this out if swapping the coconut oil for salted butter
Dried or fresh fruit of choice – I used about 1/2 cup frozen wild blueberries and a chopped up fresh apple

  1. Mix everything but the fruit together!
  2. Mix in fruit.
  3. Spoon out onto a parchment paper lined baking sheet
  4. Bake for 28 minutes @ 350*F – Turning half way if your oven’s heat is uneven like mine. 
  5. Cool & enjoy! They come out a little chewy and a little crispy and a lot delicious!

**Note – my oven temperature in the 28 minutes would fluctuate in the 350*-375* F range- so your cookies may take a little longer at 350*. For faster/crisper cookie bake them for less time at 375* and watch them closely**

I plan to try out more recipes using my spent buckwheat, which for now is residing in my overstuffed chest freezer.  You may notice this recipe included no eggs, or butter – which is my favorite fat. I needed to get some cookies made for a trip this week, and was out of eggs and butter (the horror!). So I hope to try creating another variation of cookie, as well as maybe some spent buckwheat zucchini bread.

If you have any requests for a type of recipe to try with the spent buckwheat, comment below and I will do my best to put together a recipe for it!

OnlyMeg

DISCLAIMERS:
1. I am not a medical professional, any information contained within this website should not be used as medical advice.
2. Some links contained within this website are to affiliate websites and I may receive compensation for your following these links. (I sure hope I do cuz I wanna keep blogging!)
3. All information and product recommendations are based on my own research, bias, and personal experience.

Only Essential Oils

Essential oils are all over the web these days. I’ve heard about them for years. I read about the debates of which brands and producers of essential oils are best. This is not that, it will never be that. This is simply me and a new experiment.

I have dabbled at using tea tree oil in the past for treating wounds, or adding to laundry soap and things like that – but never took it any further. I mean after all – what could just breathing in some nice smells do? And besides that – the hubs has a pretty extreme nose and a dislike for many essential oils. He cringes whenever I come in smelling of tea tree or anything like that. SIDE NOTE: I adore just a drop or two of tea tree oil in coconut oil liberally applied to prevent or heal heat rash and chaffing…..

So what changed and what am I doing with it? A friend of ours woke up one day and overnight had a golf ball sized lump appear on his thyroid. Races to the doctor of course. After however many scans and tests he got the all clear but was basically told he would just have to live with it because to remove it was too dangerous to be worth it and there is nothing else you can do. Enter lemongrass essential oil.

EXTRA DISCLAIMER – I have zero zip zilch proof that his use of lemongrass essential oil in any way shape or form affected the outcome of this story. But I am choosing personally to explore the possible non coincidence of his use of essential oils in conjunction with the disappearance of this lump.

The lump, which was clearly visible on his throat, shrunk away within several days of use topically (as well as orally more on that later) of lemongrass essential oil.

A couple weeks later another friend who also had good results, drew my curiosity to the use of essential oils in this experiment (see Resources). I am choosing to use a certain brand for my personal experiment for a few reasons.

  1. Convenience factor – because of having personal friends who already use it, it made getting started easy.
  2. Financial reasons – One of the main reasons in the past I never really looked into essential oils for my family’s medicine cabinet was the cost. Whether I ever were to make any money or not by sharing my experiences with others, at the very least their prices are in line with many top quality essential oil brands. And with the rewards program as a wellness advocate – Over time I will if nothing else I will save money by having what essentially ends up being buy one get one free next time – at wholesale prices.
  3. One and two are plenty.

Bottom line if you are interested in trying essential oils, do your research into what brand you want to use. I found this series of articles from whole new mom to be very informative. If you DO happen to enjoy my blog, I appreciate if you chose to support my blog by buying them online through the link on my Resources page. Check out the discount and rewards programs – $25/year will get you a 15% discount and $35/year gets you 25% off (wholesale prices) and you earn dollar for dollar rewards on most products. View it as another job and you can earn 25% commission on others purchases through you.

So what about me? Skeptics may question the usefulness or legitimacy of the Zyto Scanner – but I must admit the recommendations it gave me when I got scanned for the first time PEGGED a lot of my concerns. I’ll be keeping you updated on my experiences. I plan to use the oils only diluted topically and aromatically for now. While many do use certain oils internally, I greatly appreciate the words of caution and also suggestions if you do chose to use them internally found here.

It will be a while before I can get started on my experiment with essential oils. But in a few weeks I will be receiving my first order which will include: Rosemary, Geranium, Lemongrass, Women’s blend, these 4 items are specifically for me. Then I will also be getting Grounding blend, Calming blend, and trying a sample of an essential oil based muscle rub.

I’ll let you know how it goes! I look forward to eventually having a full assortment in my family’s medicine cabinet for whatever life throws at us that we can take care of naturally and at home.

OnlyMeg

DISCLAIMERS:
1. I am not a medical professional, any information contained within this website should not be used as medical advice.
2. Some links contained within this website are to affiliate websites and I may receive compensation for your following these links. (I sure hope I do cuz I wanna keep blogging!)
3. All information and product recommendations are based on my own research, bias, and personal experience.

Only Homebrew – Gluten free – Day 5

Now to wait!

So my soaked then sprouted buckwheat groats (See Day 1&2 and Day 3) were ready to roast. Instructions were to roast at 250*F for 2.5 – 3 hours. For me that was challenging as my ugly cheap propane oven does not regulate it’s temperature at all. AT ALL. As in, it is either blasting on and gets up over 400*F or is off. No matter where you put the dial, it just stays on full flame until you turn it to off again. So hubs and I decided to finally get an oven thermometer like this one and manually turned the oven on and off to keep it as close to 250*F as we could. Let them roast. Then used a water filled tequila bottle as rolling pin to crack the grains. (Aren’t we creative!)

wpid-wp-1440292592034.jpeg

Next step after cleaning and sanitizing our carboy was to mash the buckwheat. It was…. unique. The buckwheat seems to burn much more easily than other grains I’ve mashed before, and it was verrrry gluey. No matter how long we strained it, it held on to a lot of water, and made a very cloudy wort. This kit for a pale ale was way too hops deficient for our taste, so we upped it slightly and in the end used: 1oz Columbus (bittering), 1oz ea Cascade & New Zealand Maetuka (flavor), and 1oz German Perle (aroma).  At only 4oz of hops – it will be pretty mild for our taste, but should be pleasant.

After pulling a sample of the completed and chilled wort to get an OG (original gravity) for – we did a taste test. True to its mere 1.03 OG – it tastes a bit watery, but surprisingly good bitterness and hops flavor.

wpid-wp-1440429947801.jpeg

Pitched a dry yeast, and yay! It was already bubbling the next morning! (see how cloudy it is?)

We look forward to trying it out in a couple weeks. In the mean time – I am going to try to invent my own recipe for spent buckwheat cookies!! If anyone has any experience or suggestions on that, please share! Thoughts are spinning to use some oat flour with the spent buckwheat to make a relative of an oatmeal cookie…….

OnlyMeg

DISCLAIMERS:
1. I am not a medical professional, any information contained within this website should not be used as medical advice.
2. Some links contained within this website are to affiliate websites and I may receive compensation for your following these links. (I sure hope I do cuz I wanna keep blogging!)
3. All information and product recommendations are based on my own research, bias, and personal experience.

Only Homebrew – Gluten Free – Day 3

Yesterday I told you about the first step in my very first try at malting my own buckwheat for gluten free homebrew. This morning I drained and rinsed the buckwheat groats, and spread them out on baking sheets. I used parchment paper on the sheets, and then covered the groats in paper towels to keep dust/flies etc off the sprouting berries:

wpid-wp-1440081657452.jpeg

Normally this is my favorite parchment paper: If You Care – But today all I had available was some standard white bleached paper.

You have to put it in a dark and cool place. Hopefully we don’t have any heat waves but I at least have it in a dark place. As seen in the top picture above, I placed the 3 baking sheets with soaked buckwheat groats into the top shelf of my pantry, where normally I keep my baking dishes. The groats should have little sprout tails within 24 hours, and be done sprouting after 48.

To review:

Step 1 – Soak grains in filtered water for 48 hours, changing water every 8-12 hours.
Step 2 – Drain, rinse, and spread grains out over flat surface, place in dark cool place for 48 hours.
Step 3 – Roast the grains – coming up next!

As a side note, I am currently using this countertop Pur filter for all my cooking/brewing/drinking water – what do you use for your drinking water? Let me know in your comments!

OnlyMeg

DISCLAIMERS:

1. I am not a medical professional, any information contained within this website should not be used as medical advice.

2. Some links contained within this website are to affiliate websites and I may receive compensation for your following these links. (I sure hope I do cuz I wanna keep blogging!)

3. All information and product recommendations are based on my own research, bias, and personal experience.

Only Homebrew – Gluten Free – Day 1&2

We have a great local brewing supply store here in Santa Cruz County! (see Resources) Several months ago the Hubs and I went in eager to try out one of their fully gluten free kits. At the same time we also bought whatever kit was the “Monthly Special” which is always a great deal, along with some Clarity Ferm. Clarity Ferm is awesome, as a previous hophead beer addict, when I went gluten free I was afraid I might never taste a variety of delicious brews again. So right away we brewed our monthly special kit, adding our own touches of extra hops of course…. And it was SO DELICIOUS. I plan to experiment more with the use of this in the future. I am determined to find a way to be able to someday again drink a deep dark delicious overly hopped imperial stout once again… Generally speaking this Clarity Ferm is only recommended for lower gravity beers.

But what about that truly pure gluten free kit? Well its been sitting there waiting for months BECAUSE…..

We had to malt the buckwheat grains ourselves. And let me tell you, it’s a bit of a time consuming thing. And I’ve never done any malting before. So now that I have been out of work for a couple weeks, I am going to FINALLY begin the process of brewing up this truly gluten free all organic pale ale kit. To clarify, it isn’t complicated or hard, but you do just gotta have a little bit of time.

So here is what day one (yesterday) looks like:

wpid-150818074508.jpg

Pretty simple. Put the roughly 3lbs of buckwheat groats into a gallon jar, fill with filtered water. Done. For now. For 12 hours. But whoops…. forgot to change out the water last night, so hopefully I didn’t ruin it….. Changed out the water this AM – after about 18 hours instead of 12. I will change out the water once again tonight after another 12 hours.  Speaking of forgetting… I will tell you later (if I remember) about what I am currently experimenting with to hopefully improve my dreadful memory.

Summary of step 1: Soak your buckwheat for 48 hours (plus or minus 8 hours) changing water every 8-12 hours.

Join me again tomorrow for Day 3 and the next step – sprouting!

OnlyMeg

DISCLAIMERS:

1. I am not a medical professional, any information contained within this website should not be used as medical advice.

2. Some links contained within this website are to affiliate websites and I may receive compensation for your following these links. (I sure hope I do cuz I wanna keep blogging!)

3. All information and product recommendations are based on my own research, bias, and personal experience.

Only Gelatin

Out of eggs. A staple easy breakfast in our house is a couple hardboiled eggs with sea salt. Easy to eat on the go, takes minutes to prepare in advance. But today I was out of eggs. So what to send with my hubs for breakfast when he leaves the house at 5:30AM for breakfast? Meet a protein shake.

But I am not talking about a shake in a can or a pre-mixed powdered protein drink. For those of you out there who avoid dairy and soy based protein sources because of allergies or avoid all processed protein powders because of their high heat processing and MSG (a post about that is on my to do list) – what can you use for those times you need some extra protein? Grass fed beef gelatin to the rescue!

If you like a little science – my favorite aspect of using gelatin instead of other protein powders is that it is MSG free – you can read about the science on that directly on Great Lakes Website.

For a long time I would use this – Great Lakes Beef Gelatin – it is great. Grass fed and all that. Like most gelatin you would buy in the store its good for making gelatin snacks and desserts, you can use it in soups and sauces to add nutritional content. But – and here was the kicker for me – you have to dissolve it before adding it to most things so you make extra dishes, and it does not work well in anything cold like smoothies.

Enter THIS – Great Lakes Collagen Hydrolysate – a wonderful answer for smoothies and the like. It is all I buy now. Dissolves pretty well in even cold water, still has all the lovely benefits of being easy to digest, good for your hair & nails, and some good protein at 6 grams per tablespoon. For my budget cycle I usually opt for a two pack.

mason jars
(
photo courtesy of www.morguefile.com)

So here was my hubs breakfast “Chocolate Orange” smoothie this morning:
(this is for a 6ft3in 220lb man, feel free to adjust amounts depending on your protein needs)

8 Tablespoons Great Lakes Collagen Hydrolysate
1/2 cup raw milk (sources)
1/2 cup water
1/2 cup Trader Joe’s unpasteurized orange juice
2 Tablespoons cocoa powder (my favorite when I can afford it)
Splash vanilla extract
Pinch sea salt (great brand)
Ice

  1. Mix the gelatin/collagen with the room temperature water in your blender of choice (I use a mason jar and a stick blender like this one)
  2. Add all the other ingredients and blend
  3. Enjoy!

Bottom line, this is the most effective SIMPLE way to do a healthy protein packed smoothie for on the go/in a hurry. There are a lot of great recipes out there – I find most of them too complicated, this has worked well for me.

OnlyMeg

DISCLAIMERS:
1. I am not a medical professional, any information contained within this website should not be used as medical advice.
2. Some links contained within this website are to affiliate websites and I may receive compensation for your following these links. (I sure hope I do cuz I wanna keep blogging!)
3. All information and product recommendations are based on my own research, bias, and personal experience.

Only an Oven

A friend asked me the other day, how do you live without a microwave????

People avoid microwaves for various reasons. I have my reasons. It all started simply because a roommate that moved on was the owner of our apartment’s microwave. This left my sister/roommate without one and we said “eh, who needs it lets not spend the money”.  And I never looked back. There is plenty to be said regarding the health concerns of microwaves: radiation, nutrient loss, you’ve probably read it all but HERE is a great article. On top of this my hubs and I in order to have cheap rent, currently live off-grid on a solar/generator power system – so we carefully weigh what is worth using power for. So how do we heatup our leftovers?

I do NOT, and let me make this clear, enjoy doing a lot of dishes or have time to prepare each meal of the day. So my leftover heating solutions are simple.

Step 1. Make sure your plates or bowls etc are oven proof
Step 2. Put your leftovers on the plate or in the bowl
Step 3. Put it in the oven or a large size toaster oven. I love this convection toaster oven we have. Holds quite large dishes if heating up food for more than one person.
Step 4. Wait.

Step 4 is where the adjustment comes in. There is no 2 minute lunch. But with just a little planning you can make this work and not be late for the rest of your life. For example earlier today I had some leftover tacos for lunch. I popped my oven safe glass storage container with the taco meat into the oven (without the plastic lid of course), turned on the oven and while it heated got ready for work. 15 minutes later BAM lunch. Scooped the meat into a taco shell and feast time!

What temp? Back when I had an oven that the temp control worked, or when I use my toaster/convection oven, I set it 300-350. It takes practice on timing of how long it takes to heat various leftover types.

BONUS METHOD: when I have room in the fridge and am going to be eating the leftovers at home within a day or two, just pop all the leftovers into a already dirty pan from cooking the food and throw it in the fridge. When it’s time to reheat, put it on the stove and heat. That simple. This works better with some types of leftovers than others of course. Then when you are done, you have to wash the one pan/pot that was already going to need it!

As an added bonus, if like me you have a low tech gas/propane oven with a pilot light – you will already be set with all the tools you need and know what to do with them when you lose power and can’t use all your gadgets! Hopefully you don’t, but if you are ever caught in an extended power out at least you will have warm food!

OnlyMeg

image

DISCLAIMERS:
1. I am not a medical professional, any information contained within this website should not be used as medical advice.
2. Some links contained within this website are to affiliate websites and I may receive compensation for your following these links. (I sure hope I do cuz I wanna keep blogging!)
3. All information and product recommendations are based on my own research, bias, and personal experience.

Blog at WordPress.com.

Up ↑